Activity To Do List
-
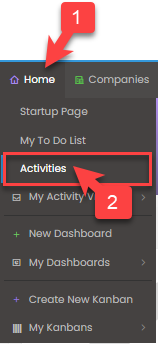
To enter into your “Activity To Do List”, hover over the home button on your dashboard and click “Activities.” This list is a compiled list of all the Activities you have either created for yourself or another colleague has assigned to you. All of these Activities are pending and are due up to today’s date.
-
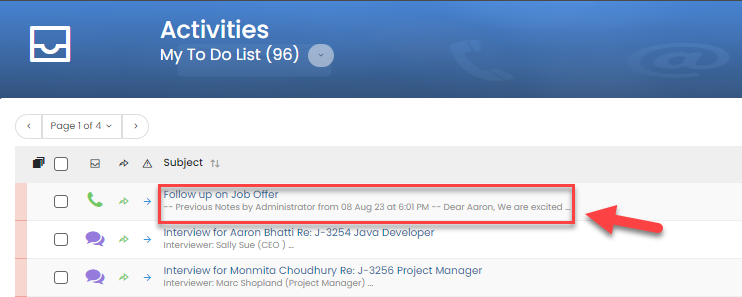
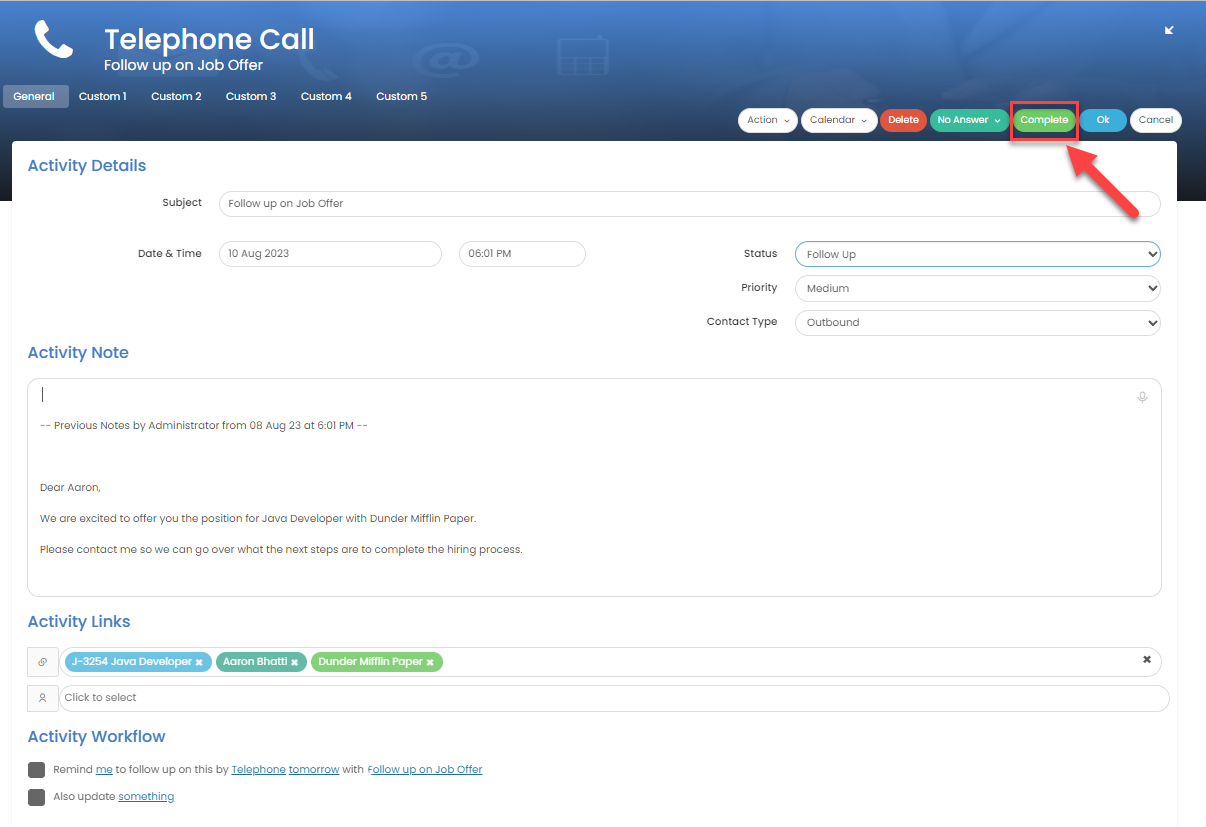
To view the Activity, click on the “Subject” of the Activity. A pop out window with all the Activity details will appear. Here you can make any changes or edits you would like. You can also choose to Complete the Activity here by clicking the green “Complete” button at the top of the Activity. By Completing the Activity, it will remove the Activity from your to Do List.
-
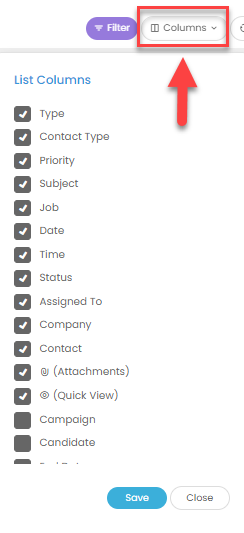
To organize your Columns, click the “Column” button on the upper right of your “To Do List”. Click the “Grey Boxes” next to each Column type to check or uncheck if you would like this Column to be viewable or not viewable in your list.
-
To Quick View each Activity, click they grey “Eye” button on the right of your Activity. This will open a Quick View Preview of the Activity. This will show you all important details associated with this Activity.

-
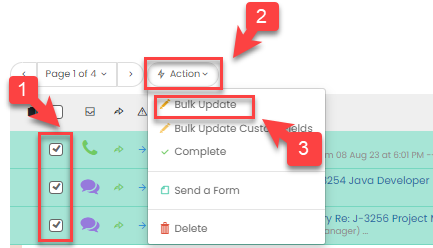
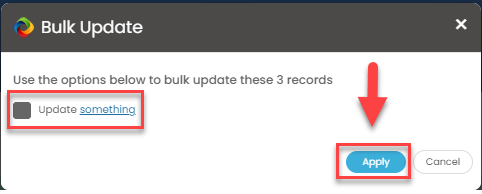
To Bulk Update your Activities, click the “Grey Check Box” to the left of whichever Activities you would like to select. Click the lightening bolt “Action Menu”. From the drop down menu that appears, click “Bulk Update”. A pop up menu will appear, here you can choose what you would like to Update. Once you are satisfied, click the blue “Apply” button.
-
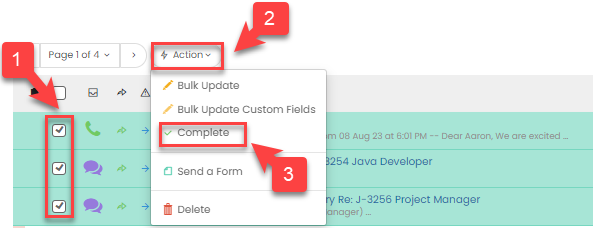
You can also Bulk manage your Activities by selecting each Activity you would like to Update by clicking the grey “Check Boxes” to the left of the Activity. Click the lightening bolt “Action” button and select “Complete” from the drop down menu. Once you have Completed the Activities, they will be removed from your To Do List.
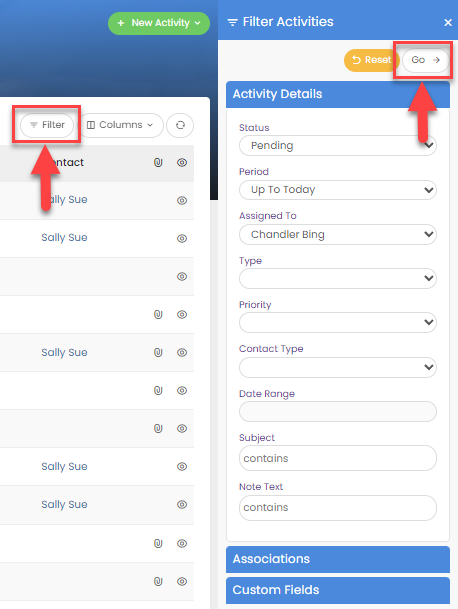
7. Another way to manage your To Do List is by clicking the purple “Filter” button at the top right of your To Do List. This will drop down different options to Filter your List. You can select to show only Activities with a certain Status, by the Date they are due, who they are assigned to etc.
Once you are satisfied with your Filters, Click the “Go” button on the upper right of the Filter menu. To Save these specific Filters for future use, click the blue “Save” button at the top of your Filter menu to Save this as a “Saved View”.
-
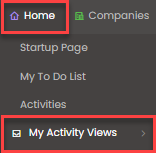
To view your Saved View, hover over the “” button on your dashboard. From the drop down menu, Click “My Activity Views” Here you will be able to see any “Saved Views” you have created.
-
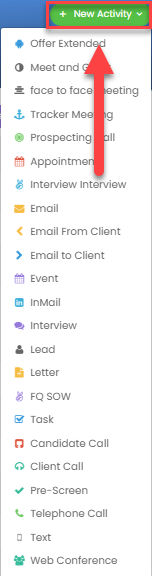
To create a New Activity from your To Do List View, click the green “New Activity” button in the upper right hand corner. Choose which Activity you would like to create. An Activity pop up window will appear where you can enter in the appropriate details for the Activity.
If you need further assistance, please watch this video: